On the Knowledge Centre on Translation and Interpretation, you can contribute through 'communities'. Communities are collaborative spaces where users can discuss a specific topic with other members of the platform. When interacting through communities, please abide by the code of conduct.
You can watch our YouTube tutorial, or refer to the instructions below to learn how to use the communities.
Create a community
To create a community, you can go to the home page, scroll down to 'Collaborative spaces' and click on 'Communities'. There, you can click the button 'Create a new community'.

You will then be directed towards a page 'Add group' where you need to choose 'Community'.

When creating a community, you can use the three tabs on the left to add content.
- Under the 'General' tab, you can select:
- Language of the community
- Title
- Headline: a brief explanation of the topic
- Caption: this field cannot be edited by users
- Body: a longer explanation or questions about the topic

- Under the 'Categorization' tab, you can select:
- Classification: the type that corresponds to the community's main topic (conference interpreting, public service interpreting, legal interpreting or innovation).
- Keywords: select all the relevant keywords for the community. These can later be used to search a community.
-
Group visibility: if the group is public, it will be displayed in the list of communities and anyone will be able to join. If it is private, it will be hidden from the list and only members added by the creator of the community will be able to view it and interact with it.

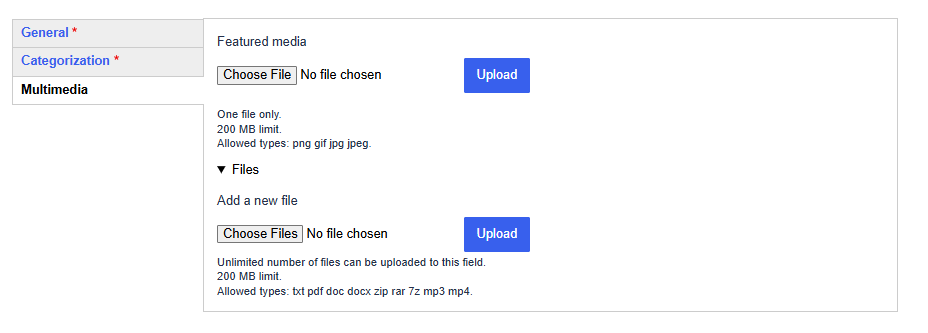
- Under the 'Multimedia' tab, you can select:
- Featured media: if you upload an image here, it will be displayed in the 'body' of the community. However, it is also possible to insert images directly into the 'body' section through the 'General' tab.
-
Files: here you can upload documents. Members will be able to access these documents through the community.
After including all these details, make sure to click the 'Save' button on the bottom of the screen, and your Community will be created.
Draft text
In the community environment you will have the opportunity to draft text, for instance to create the body text of a community, create a post or create a wikidoc (the latter options will be explained below). The user interface to draft text looks the same in all these instances. You can use the toolbar above the text box to format the text. You have the possibility to:
- add headings, using the drop-down menu on the left-hand side of the toolbar:

- format the text in bold, italics or underline.
- insert a table using the icon selected in the image below:
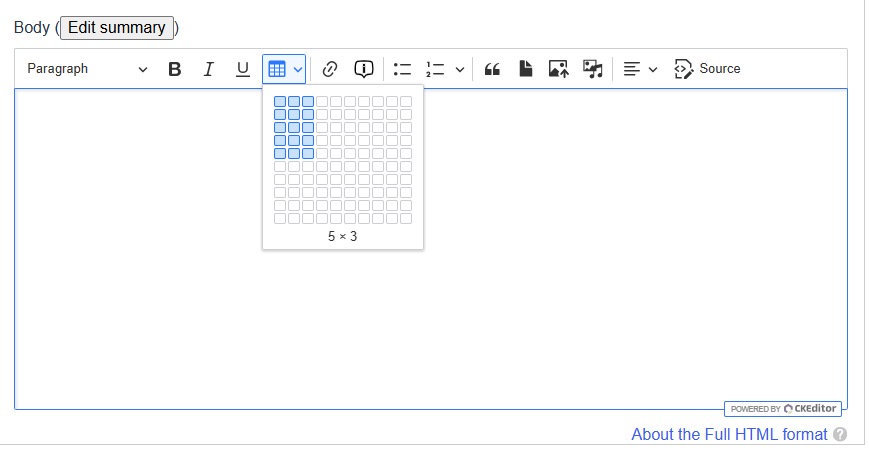
-
add a hyperlink. You can select the text that you want to turn into a hyperlink, click the icon highlighted below and paste the URL that you want to refer to in the bar that appears:

-
add an information cloud. This is a text that appears when users hover over a term to which you have added the information cloud. To do so, you can select a term or phrase, click the icon highlighted below and enter the text that you want to appear in the information cloud. This functionality can, for instance, be used to clarify abbreviations as demonstrated in the example below.


-
as depicted in the image below, you can also (1) create bullet-points, (2) add a quote, (3) insert a file, (4) insert an image, (5) insert other media.

Create a post
Within the community that you have created, you and other members can create posts. Posts can be used to, for example, share insights or ask questions. Other members can reply to posts allowing for interaction between community members.
To create post, navigate to the community and click the 'write a new post' button:

You will then land on the following page, where you can create your post (also referred to as 'comment') by providing a subject and drafting a text in the 'Comment' section:

Tag a member
When creating a post, you also have the possibility to tag members by typing an '@' and writing their name. A drop-down menu will appear where you can then select the member you want to tag. They will be notified about the tag via the e-mail address they used to create their EU Login account.

Interact with posts
Once a post has been created, you can like, report, delete or reply to a post. Only members with an 'administrator role' will be able to delete posts.

Manage comments
As the creator, and therefore moderator, of the community, it is your responsibility to keep track of reported comments and delete them if necessary.
To get an overview of comments that have been reported, you can navigate to the 'Reports' tab in the community:

In addition, you can get an overview of the comments that have been 'liked' by navigating to the 'Likes' tab:

Manage members
When you click on the 'members' tab of a community you will see a list of all the members.

To manage a member in this list, you can click the arrow next to 'view member':

You can choose 'edit member' to change their role (admin/non-admin), or you can choose 'remove member'.
Add a member
When you click the 'Add membership' button, you will be able to search for the name of the person you would like to make a member of the community:


You can then select them from the drop-down menu. If you want this person to have the same rights as the community creator, tick the 'Admin' box. They will then be able to edit the community. If not, leave this box unticked. Members that are not an 'admin' will still be able to interact with the community (e.g. write a post or reply to another post), however they will not be able to edit the community itself.
Once you click 'save' the user will receive a notification that they have been added to the community via the e-mail address they used to create their EU Login account.
Draft a Wiki doc
A Wiki doc is a shared document that members of a community can draft, for instance with the main conclusions of the community's discussion or with content they think would be useful to add to the Knowledge Centre on Translation and Interpretation.
In order to create a Wiki doc, navigate to the 'view' tab of a community and select 'Wiki docs' in the left-hand menu.

Once you click the 'Create a wiki doc' button, you will land on a page where you can start drafting a document with all the other members of the community. You can add a title and write the text in the Body section.

Edit a community
You will only be able to edit a community if you created it, or if its creator gave you an administrator role.
You can edit a community by clicking the 'edit' tab of the corresponding community:

You will then be able to modify all the fields that were filled in when the community was created.
Join an existing community
On the home page, when you scroll down to 'Collaborative spaces' and click on 'Communities' you can search for an existing community using the search bar or any of the filters on the left-hand side (see below).

When you find a community that you are interested in, select the community and click the 'Join community' button.

To get an overview of all the communities you are part of, click on the arrow next to your name on the top of the page, select 'My account' and 'My Communities'.
